Make A Picnic Caddy
Help the kids make a cheerful picnic caddy for your next outdoor BBQ, picnic, or family cookout. This easy summer craft gives kids a fun way to help organize ketchup, mustard, salt, pepper, and other picnic table supplies.
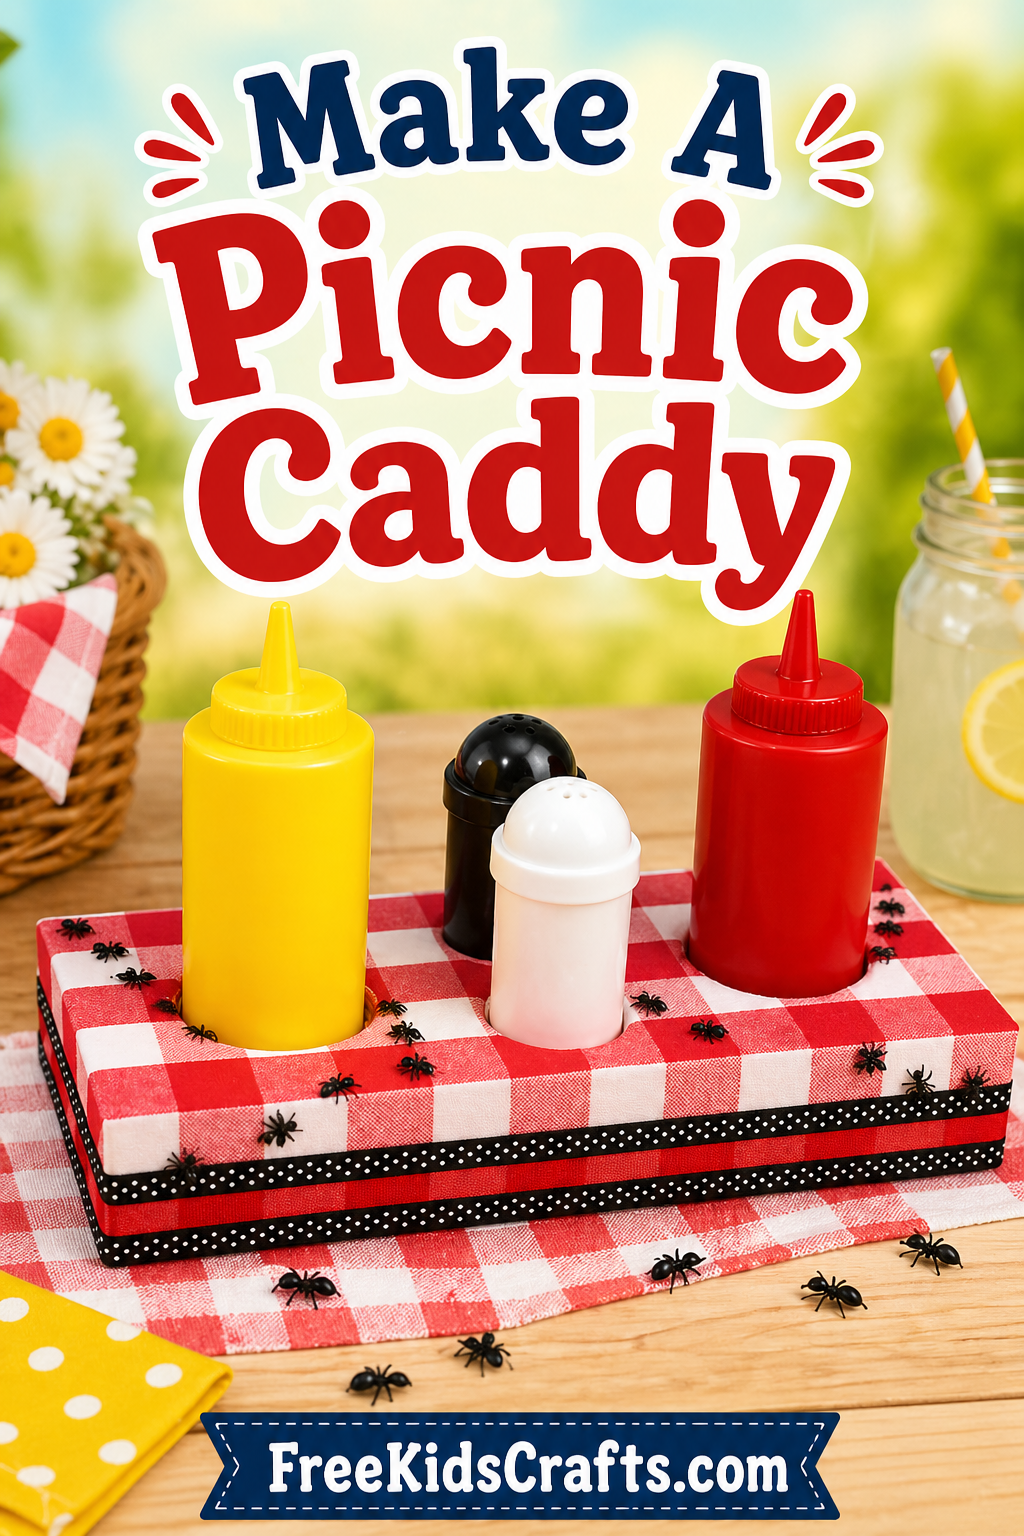
Decorate it with red and white check fabric for a classic picnic look, or change the fabric and decorations for fall BBQs, birthday parties, camping meals, or classroom pretend-play activities.
Fun Fact
In the year 2000, a 600-mile-long picnic took place in France on July 14 to celebrate the first Bastille Day of the new millennium.
Supplies
- STYROFOAM™ brand foam sheet, 2″ x 5″ x 12″ or larger to trim to size
- Foam cutter or serrated knife, with adult supervision
- Red and white check fabric, 1/2 yard
- Black ribbon with white polka dots, 2 yards of 3/8″ wide ribbon
- Spray can lid, about 2 1/2″ diameter
- Plastic ants
- Plastic ketchup and mustard bottles
- Plastic salt and pepper containers
- Black mat board or heavy cardboard, 5″ x 12″ piece
- Clear heavy plastic or shrink plastic, 8 1/2″ x 11″ piece
- Tacky glue
- Extra strength glue stick
- Cutting mat
- Ruler
- Scissors
Instructions
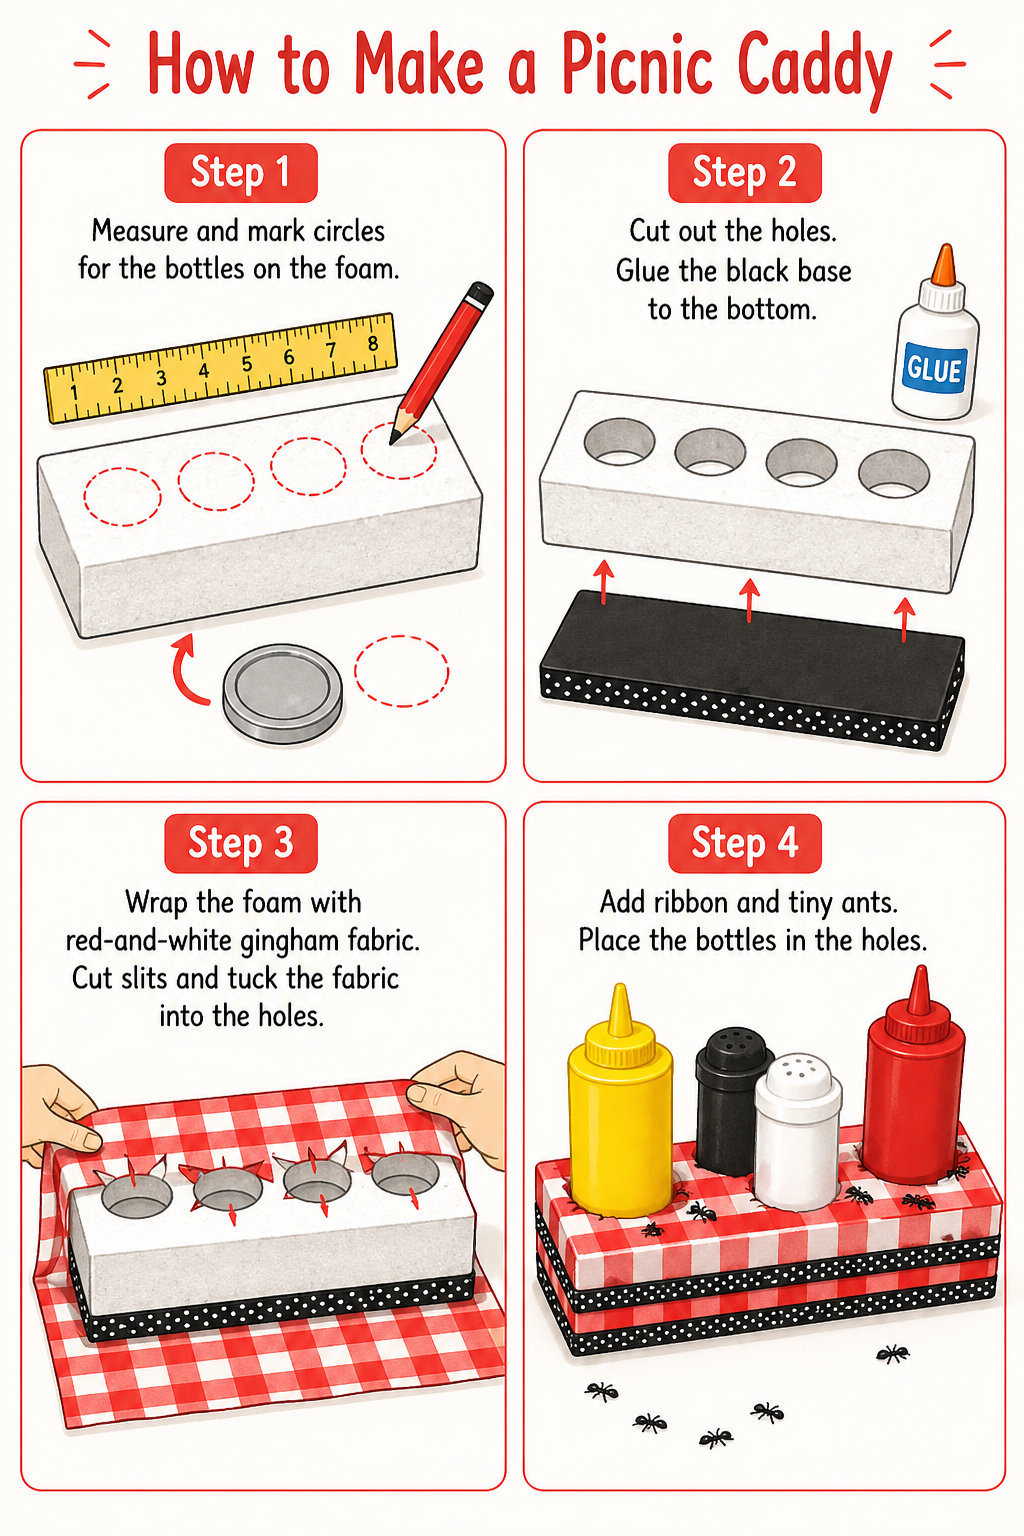
- Have an adult measure and cut a 2″ x 5″ x 12″ piece of foam using a foam cutter or serrated knife.
- Decide where the ketchup and mustard bottles will sit. Use the spray can lid as a template by pressing it halfway down into the foam, then remove it.
- Carefully cut out the marked foam circles using a foam cutter or serrated knife.
- For the salt and pepper containers, use a small lid that is close to the same size, or press the bottom of a salt or pepper container into the foam to mark the placement. Cut out those openings too.
- Trim the black mat board or heavy cardboard to fit the bottom of the caddy. Glue it in place to give the picnic caddy a sturdy base.
- Cut the fabric into a 15″ x 17″ piece. Using the glue stick, begin at the bottom of the caddy and wrap the fabric around the foam.
- Fold and glue the ends of the fabric the way you would wrap a gift.
- At each opening in the caddy, carefully cut small slits in the fabric about 1/2″ apart. Fold the slit pieces down into the openings and glue them to the inside edges.
- To line the inside of the openings, cut two 2″ x 8″ pieces and two 2″ x 6″ pieces from shrink plastic or heavy plastic.
- Cover both sides of each plastic strip with fabric using a glue stick. Place the covered strips inside the openings to create a neat fabric-lined edge.
- Use tacky glue to attach ribbon around the outside of the caddy.
- Glue plastic ants to the outside for a fun picnic-themed decoration.
- Place the ketchup, mustard, salt, and pepper containers into the finished picnic caddy and set it on your picnic or BBQ table.
Craft Tips
Use a low-temperature glue gun with adult help if you want a stronger hold for the ribbon and plastic ants.
Try different fabrics for different seasons. Red checks are great for summer crafts, orange plaid works well for fall, and bright prints are fun for birthday parties.
This caddy can also hold napkins, wrapped utensils, straws, or small condiment packets if you adjust the opening sizes.
Patterns, Templates and Printables
Click on the pattern or project image below to view and print any available templates for this picnic caddy craft.
Teacher Friendly Educational Extension
Turn this picnic caddy craft into a simple classroom activity about planning, measuring, and helping at home. Kids can measure the foam, compare container sizes, and talk about why organizers make picnic tables easier to use.
For a writing prompt, ask students to design their own picnic theme and write a short paragraph about what foods they would bring. For a math connection, have students measure the length, width, and height of the caddy, then compare it with other classroom containers.
This is also a fun summer classroom activity for discussing outdoor safety, family traditions, and ways children can contribute to group events.