Ocean Creatures Finger Puppets
Bring the ocean to life with these adorable Ocean Creatures Finger Puppets. Kids will love creating their own starfish, clam, and jellyfish using soft felt and simple shapes. These easy crafts for kids are perfect for imaginative play, storytelling, and even classroom activities. The included background pouch doubles as a mini ocean scene to make playtime even more fun.
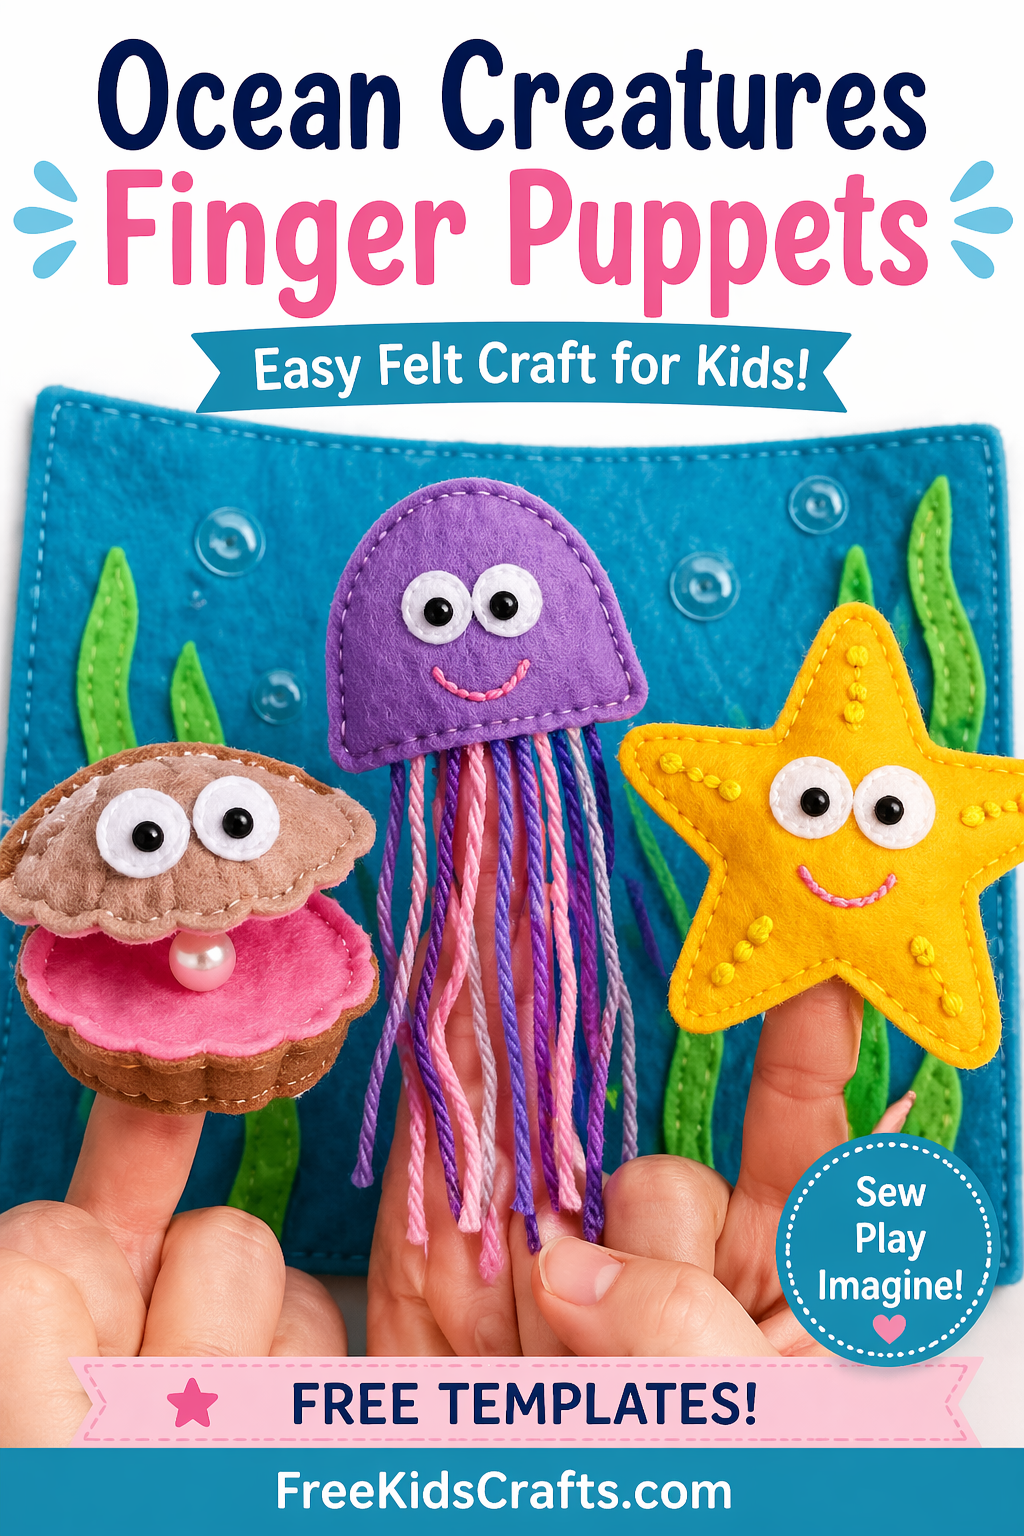
Supplies
• Felt in assorted colors (yellow, pink, brown, purple, blue, green, white)
• Felt glue
• Embroidery floss (black, pink, yellow)
• Embroidery needle
• Black beads
• Clear buttons
• Pearl bead
• Butcher paper (for templates)
• Scissors
• Pins
• Sewing machine or needle and thread
Instructions
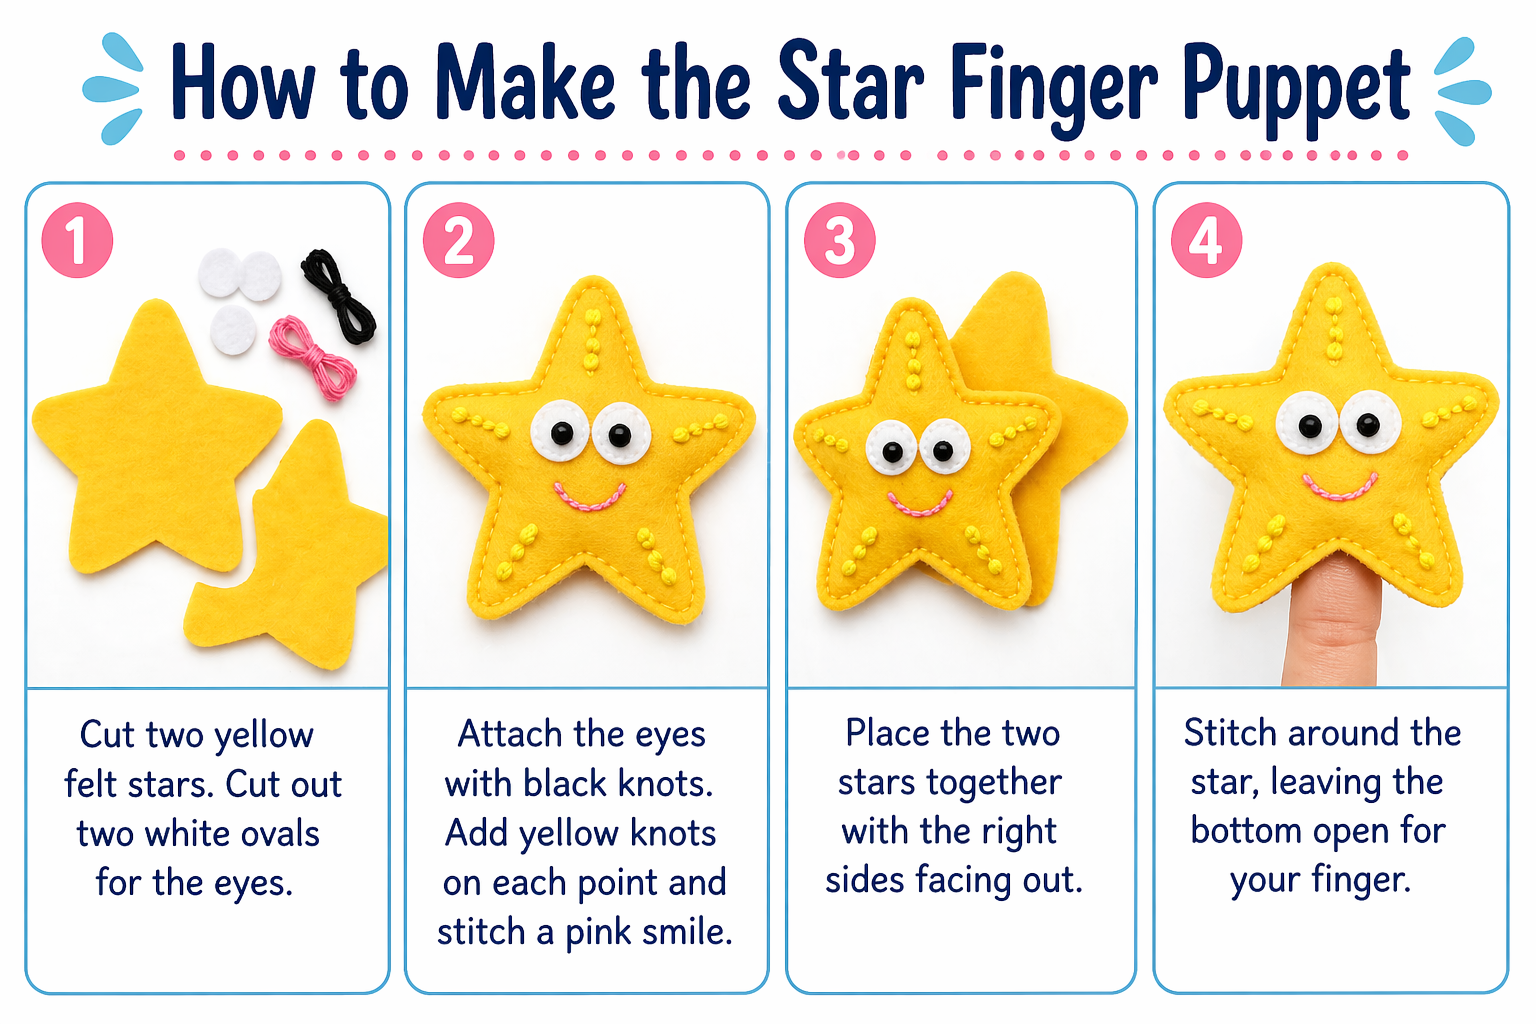
Starfish Finger Puppet
- Trace a 3-inch star onto butcher paper and cut it out.
- Pin the template to yellow felt and cut out two pieces.
- Cut small white felt ovals for eyes and attach them using black embroidery floss or beads.
- Add decorative stitches to each arm of the star using yellow embroidery floss.
- Stitch a simple smile using pink embroidery floss.
- Sew the two star pieces together, leaving the bottom open so it can fit on a finger.
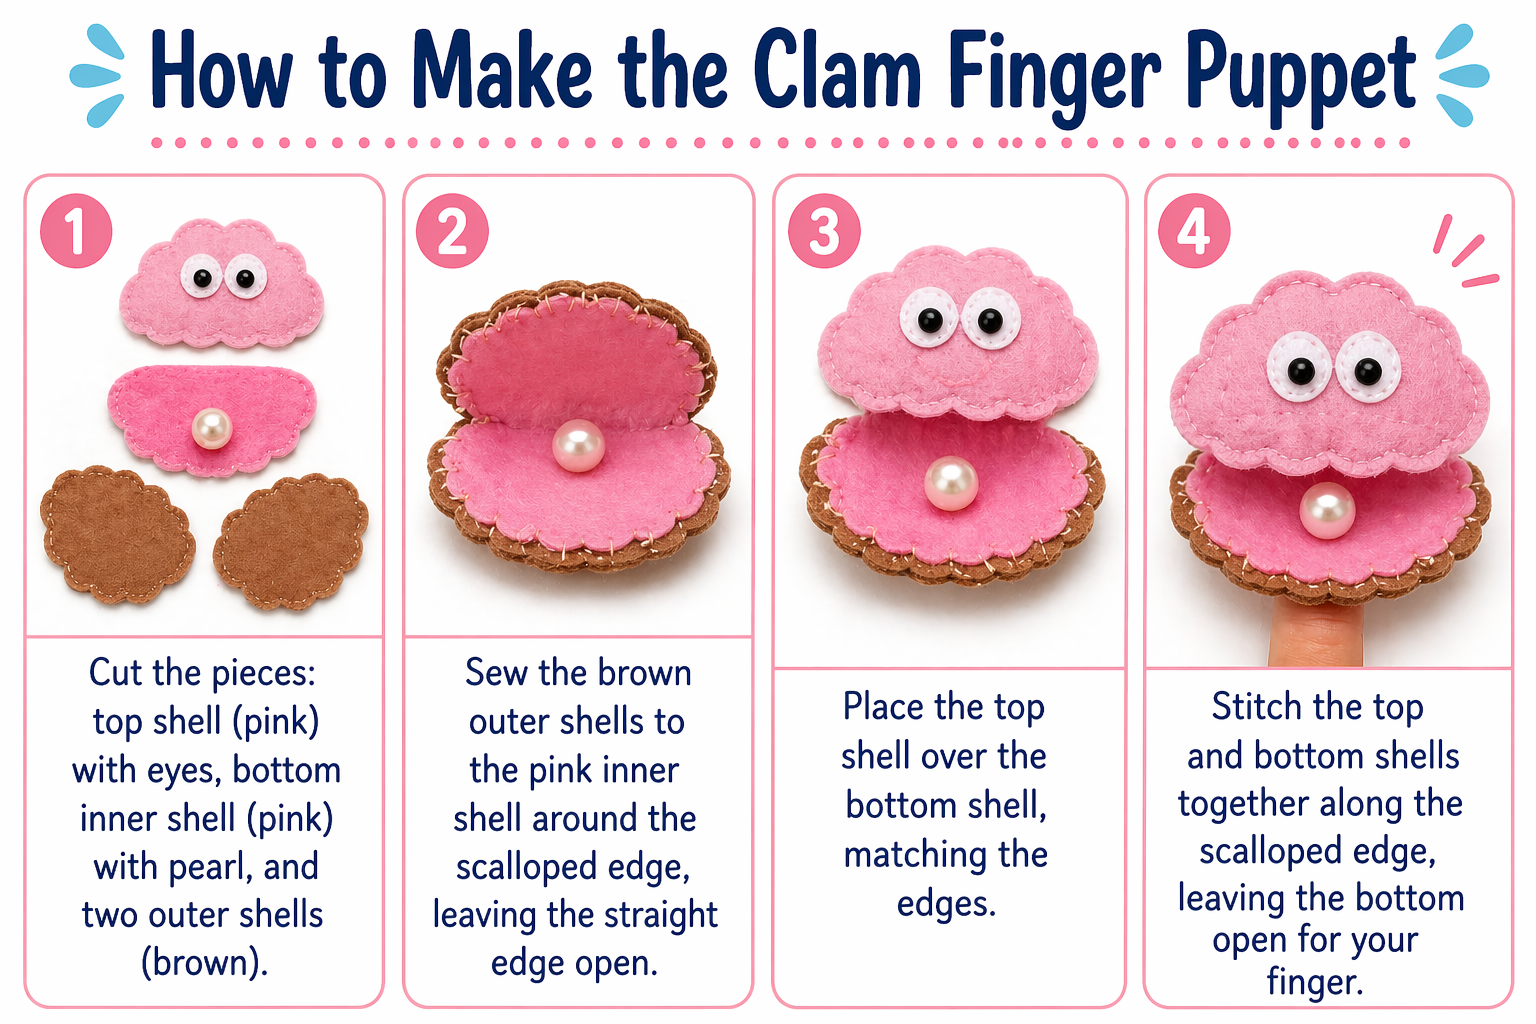
Clam Finger Puppet
- Trace a 2.5-inch circle onto butcher paper and add scalloped edges along the top half.
- Fold and cut the template to create a hinged shell shape.
- Pin and cut the shape from pink felt for the inside and brown felt for the outer shell.
- Attach small white felt ovals and black beads for eyes.
- Sew a pearl bead onto the inside bottom piece.
- Sew the outer shell pieces onto the inner shell, leaving the bottom open for fingers to fit inside so the clam can “talk.”
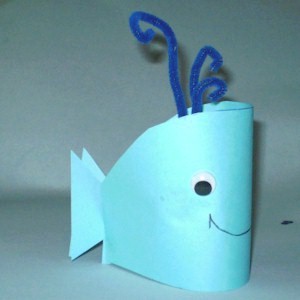
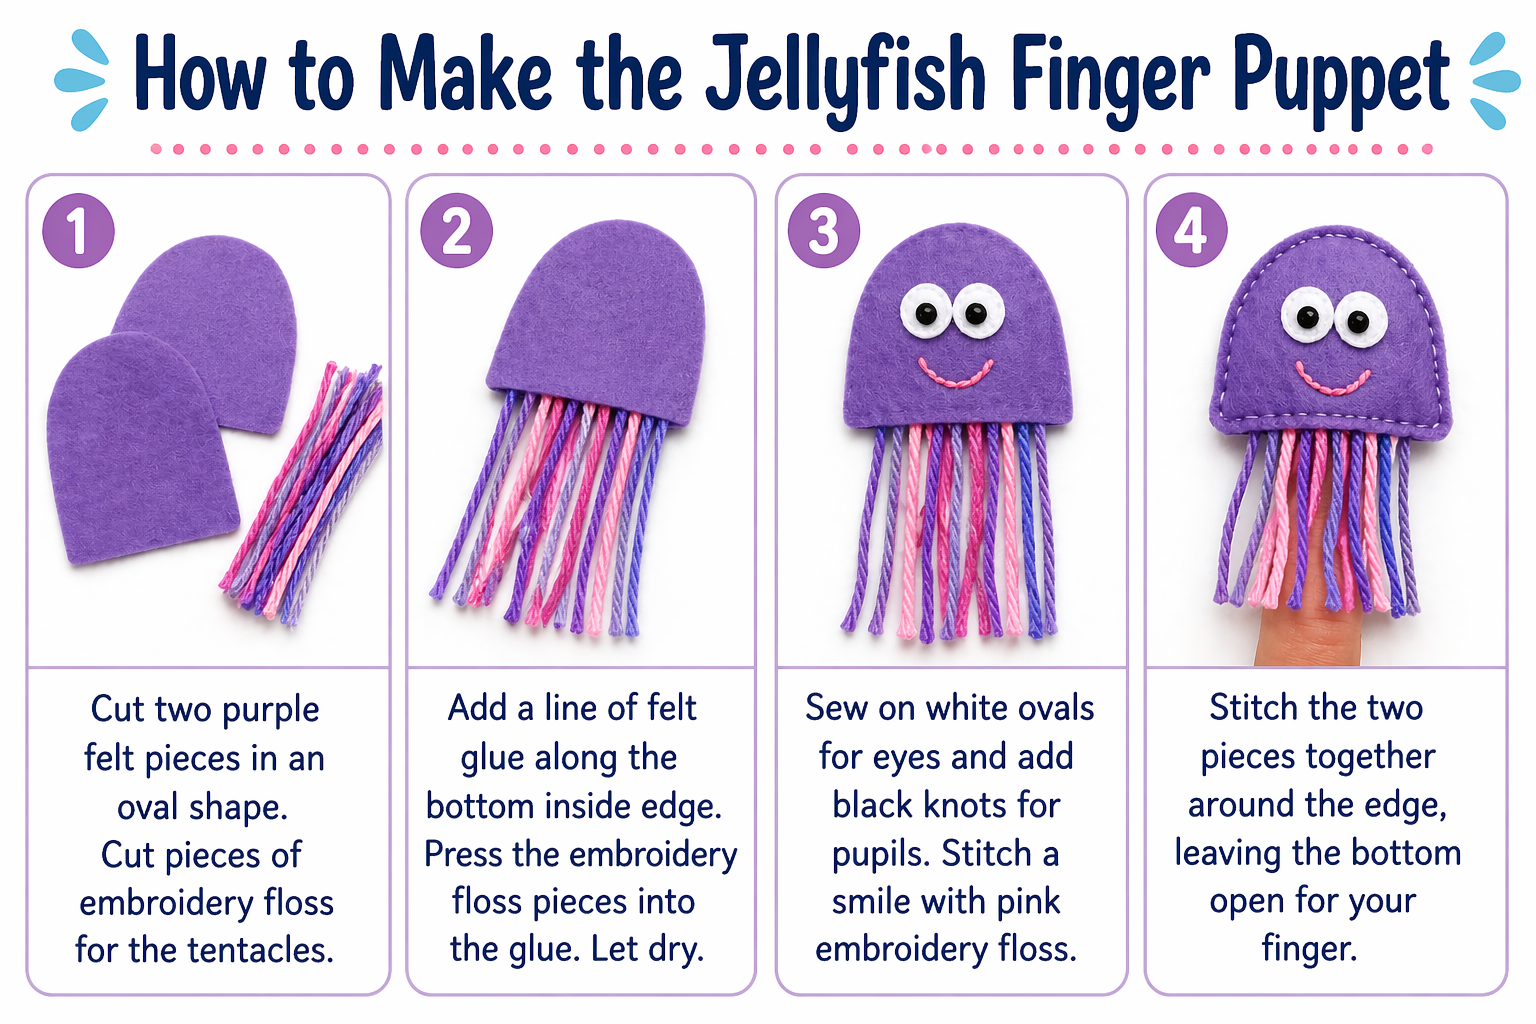
Jellyfish Finger Puppet
- Trace an oval shape about 2 x 2.5 inches onto butcher paper and cut it out.
- Pin and cut two pieces from purple felt.
- Add a line of felt glue along the bottom edge and press strands of embroidery floss into the glue for tentacles. Let dry.
- Attach small white felt ovals and black embroidery floss for eyes.
- Stitch a smile using pink embroidery floss.
- Sew the two pieces together, leaving the bottom open for fingers.
Background Pouch
- Cut a piece of blue felt to approximately 11 x 7.5 inches.
- Cut strips of green felt to resemble seaweed and stitch them onto one side.
- Add clear buttons as bubbles.
- Fold the felt in half and stitch around the sides, leaving the top open to create a pouch.
- Use the pouch as a backdrop while playing with your puppets.
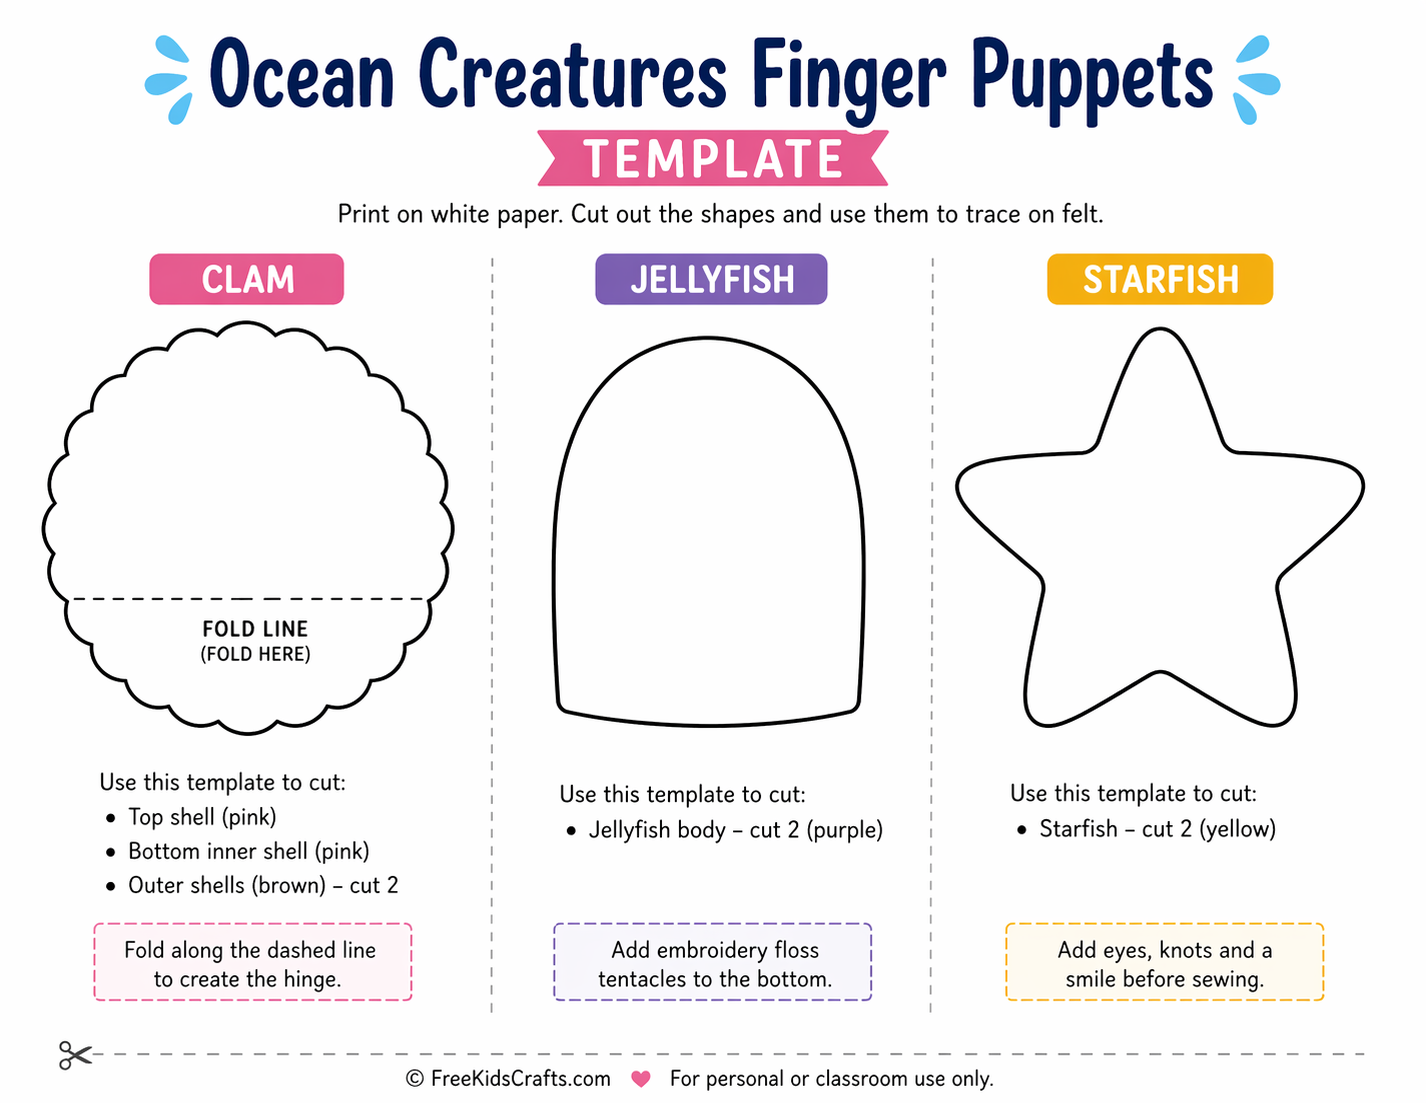
Patterns, Templates and Printables
Create simple printable templates for stars, circles, and ovals on white paper. These basic shapes make it easy for younger kids to cut and assemble their ocean creatures. Click on the pattern to open it in a new window to print in the correct size.
Teacher Friendly Educational Extension
Turn this craft into a fun ocean learning activity. Ask kids to name each sea creature and talk about where it lives in the ocean. Encourage storytelling by having kids create their own underwater adventures using their puppets.
You can also introduce simple science concepts like ocean habitats, marine life characteristics, and how sea creatures move. For older kids, try adding a writing activity where they create a short story or script for a puppet show.
Supplies
Stars
Circles
Ovals
45 mm Comfort Grip Rotary Cutter
12.5 x 12.5 Acrylic Ruler
24 Inch x 36 Inch Mat
12-in-1 Sewing Multi-Tool
Comfort Grip Micro-Tip Scissors
Felt
Felt glue
Sewing machine/thread
Embroidery floss
Embroidery needle
Pins
Clear buttons
Black beads
Pearl bead
Butcher paper
Instructions
Star:
Trace 3" star from star shape template onto butcher paper and cut out.
Pin pattern to yellow felt and cut out twice.
Cut two small ovals from white felt and adhere to front of star with a french knot of black embroidery floss.
Add three french knots with yellow embroidery floss to each point of star.
Hand stitch smile onto star with pink embroidery floss.
Machine (or hand) stitch around star leaving bottom open.
Clam:
Trace 2.5" circle from circle shape template onto butcher paper. Mark at each grid mark at top making 7 marks total.
Use scalloped edge of circle shape template. Align a scallop between each set of markings and draw in scallop.
Fold paper just above bottom of circle and cut out template. This gives you a doubled shell.
Pin and cut out template from pink and brown felts. Cut brown felt in half as shown.
Sew on white ovals of felt on top shell with black beads and thread.
Sew pearl onto bottom half of pink inner shell.
Sew brown out shells onto pink inner shell around circle edge, leaving the straight lines open for fingers.
Jellyfish:
Trace 2" x 2.5" oval from oval shape template onto butcher paper and mark oval at 4th grid mark down on each side.
Align grid marks with pill-shaped marking on side of template and trace as shown on each side, connecting bottom lines at center.
Cut out template. Pin and cut out two pieces from purple felt.
Add line of felt glue along interior bottom of one piece. Add cuts of embroidery floss and go back with another line of felt glue on top. Allow to dry fully.
Once dry, sew on two oval felt eyes using black french knots.
Hand stitch a smile using pink embroidery floss.
Stitch both sides together leaving bottom open.
Background Pouch
Trim blue felt to 11" x 7.5" using rotary cutter and acrylic ruler on cutting mat.
Cut out strips of green felt by hand organically and stitch along short side of felt.
Stitch on a few clear buttons (depending on age of child) for bubbles.
Fold felt in half and stitch around perimeter leaving entire bottom open.
Other Images
Click on an image to open it in a new window


Contributor
You can read creative and compelling articles by industry experts and get great new project ideas in the areas of home decorating, kids crafts, party invitations, scrapbooking, sewing, quilting, and more! In addition, fiskarscrafts.com will feature how-to videos on some of Fiskars’ coolest products, offer live online customer service, and have a crafting message board.