


Easy Origami Bird
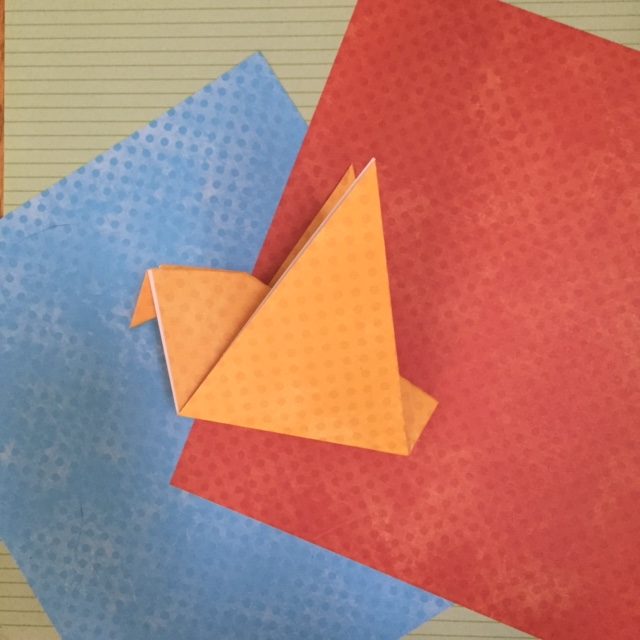
Make an Easy Origami Bird with the diagram and instructions printed below. We made this project in a printable format so that you can carry it with you as you keep making origami birds until you can do them without looking at the instructions. This is an easy origami project, but as you become more skilled you will want to learn how to fold some more complex designs.
Trivia
Did you know that origami has a strong link to mathematics and is used in practical solutions such as airbags in vehicle? Source: Ten Random Facts – Origami
Supplies
Thin paper squares
Instructions
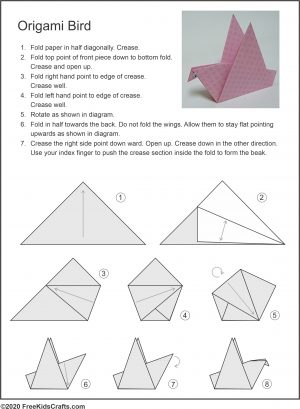
- Fold paper in half diagonally, crease.
- Fold top point of front piece down to bottom fold. Crease and open up.
- Fold right hand point to edge of crease and crease well.
- Fold left hand point to edge of crease and crease well.
- Rotate as shown in diagram.
- Fold in half towards the back. Do not fold the wings. Allow them to stay flat pointing upwards as shown in diagram.
- Crease the right side point downward. Open up. Crease down in the other direction. Use your index finger to push the crease section inside the fold to form the beak.
Patterns, Templates and Printables
Click on a pattern to open it in a new window to print
![]()

Award your kids with an inexpensive and colorful origami patch from MakingFriends.com. They can wear them, collect them or trade them.


Supplies
Instructions
Contributor
Want to have some creative family time? Print out our SudBudz® Masks and get crafty with the kiddos! More than just a typical Fizzy Bath Ball, SudPrize® is a first ever line of skin-loving and natural bath products that make bath time Fun for Kids and Easy for Moms. A Free companion App, SudBudz® engages your children into an immersive world of special and unique characters called SudBudz®.
Tags origami crafts
0 thoughts on “Easy Origami Bird”