


Woven Placemat Craft
Basic weaving skills and this original Free Kids Craft project can turn basic burlap into a pretty and practical Woven Placemat that can be used over and over again. This is a perfect project for camp craft time.
Trivia:
Weaving is one of the oldest crafts in the world. Even before weaving was used to make cloth the practice of interlacing plants and branches was used to create baskets, shelter, and fences. Source: Greenwich Historical Society – Ancient Crafts: Weaving
Supplies
- Burlap
- Assorted Yarn and Ribbon
- Large Blunt Needle or Tacky Glue
- Scissors
Instructions
- Cut burlap into 12″ x 18″ pieces.
- Fringe ends by pulling off pieces of the burlap all around the four sides.
- Select a strand of burlap about 1″ from the bottom edge, grab it firmly pull it all the way out. Discard. Pull out additional pieces until you have gap a little thicker than a piece of your ribbon.
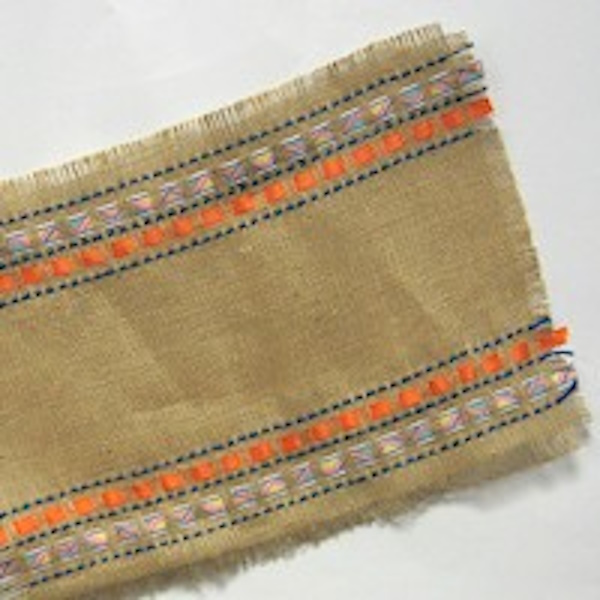
- Weave the ribbon in and out of the burlap in this space. Don’t try to go in and out of each strand but do a pattern such as “Skip 5, weave down, skip two weave up, etc.” Repeat 1″ from the top edge. See photo for reference.
- Continue with other pieces of ribbon or yarn. When weaving yarn, you can either use a large blunt needle or stiffen the end of the yarn with tacky glue to create a stiff point.
- Weave until you are happy with the overall project. Trim ends.
![]()


Supplies
Burlap
Assorted Yarn and Ribbon
Large Blunt Needle or Tacky Glue
Scissors
Instructions
Contributor

These projects are created by Terri, Betty, Jamie or one of the talented staff members at MakingFriends.com. They have been created exclusively for publication on FreeKidsCrafts.com with supplies you'll be able to find around your house.
0 thoughts on “Woven Placemat Craft”