


Origami Parakeet
The FreeKidsCrafts team designed this Origami Parakeet for you to add to your paper folding collection. Origami can be simple for beginners and evolve into very complex and beautiful creations. Get the kids started early. If you want to make it even more fun set origami goals and reward them with an affordable Origami Patch.
Supplies
- Origami Square in a color that pleases you
- Wiggle eye (optional)
- Black Marker (optional)
Instructions
- Click on the images below for complete folding diagrams.
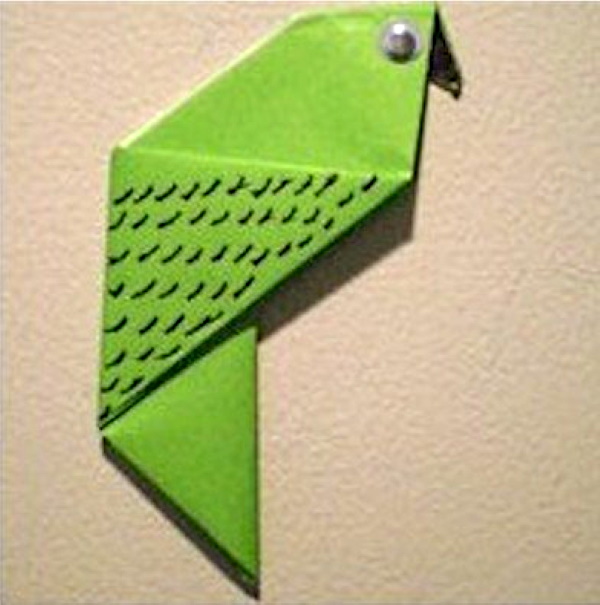
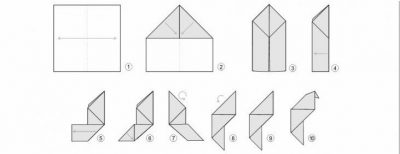
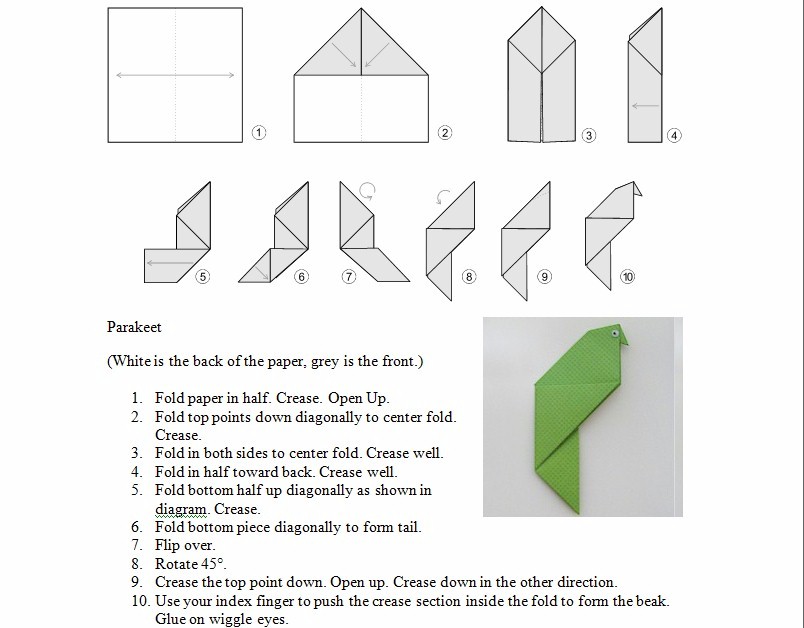
- Fold paper in half. Crease. Open up.
- Fold top points down diagonally to center fold. Crease
- Fold on both sides to center fold. Crease well
- Fold bottom half up diagonally as shown in diagram. Crease
- Fold bottom piece diagonally to form tail.
- Flip over.
- Crease top point down. Open up. Crease down in the other direction.
- Use your index finger to push the crease section inside the fold to form the beak.
- Draw on eye or use adhesive wiggle eye.
I like to embellish my origami by coloring in the beak and adding an indication of feathers on the wings. It’s your creation. Do anything you like to it.
Images, Patterns, Templates and Printables
Click on a pattern to open it in a new window to print
![]()

Award your kids with an inexpensive and colorful origami patch from MakingFriends.com. They can wear them, collect them or trade them.


Supplies
Instructions
Other Images
Click on an image to open it in a new window
Contributor
Want to have some creative family time? Print out our SudBudz® Masks and get crafty with the kiddos! More than just a typical Fizzy Bath Ball, SudPrize® is a first ever line of skin-loving and natural bath products that make bath time Fun for Kids and Easy for Moms. A Free companion App, SudBudz® engages your children into an immersive world of special and unique characters called SudBudz®.
Tags origami crafts
0 thoughts on “Origami Parakeet”