


Decoupage Sneaker Craft
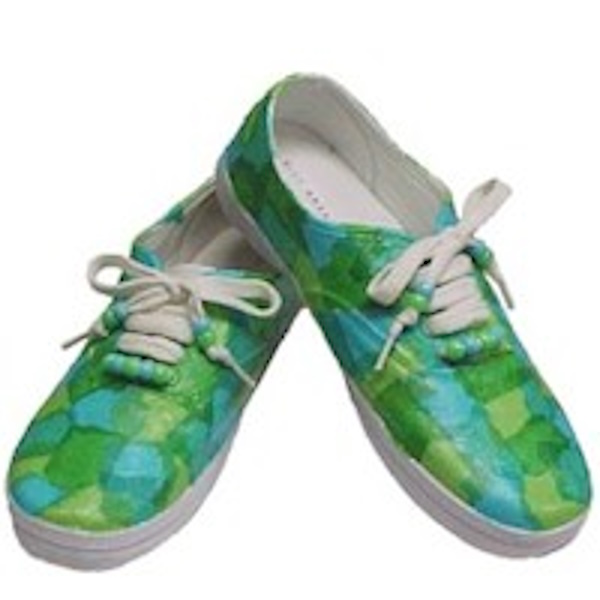
Decoupage sneakers can be a fun and creative way to express your personal style. By using the right decoupage solution, you can ensure that your designs stay intact for months to come. The appeal of decoupage sneakers lies in the fact that you can create unique designs on an inexpensive pair of white sneakers, allowing you to stand out from the crowd without spending a fortune on designer footwear.
Creating your own decoupage sneakers gives you the freedom to showcase your creativity and individuality. Instead of paying hundreds of dollars for mass-produced sneakers that many others may already have, you can be a trendsetter by designing your own unique pair.
So, if you enjoy do-it-yourself projects and want to add a personal touch to your footwear, decoupage sneakers can be a cool and cost-effective option for you. Just remember to use the right materials, take your time with the process, and enjoy the satisfaction of wearing your own custom-designed sneakers.
Trivia:
The first sneaker was created in 1800, as a simple rubber-soled shoe. The nickname “sneakers” came about because they were so quiet; they even came to be used by thieves in their sneaking.
Supplies
- Canvas Sneakers
- Tissue Paper
- Outdoor Mod Podge
- Pony Beads
- Foam Brush
Instructions
- Select tissue paper in your preferred colors. You can choose a single color or a combination of colors that match your personal style or the sneakers’ design.
- Tear off the straight edges of the tissue paper to create irregular pieces approximately 1″ in size. Irregular shapes will give a more textured and interesting look.
- Prepare your sneakers by cleaning them to remove any dirt or dust. Make sure they are dry before starting the decoupage process.
- Starting at the toe area and along the sole, apply a thin layer of decoupage solution using a paintbrush. This will act as an adhesive for the tissue paper.
- Select a piece of tissue paper and lay it on the area where you applied the decoupage solution, ensuring that it fits along the curve of the sole. Overlap the edges of the tissue paper with other pieces to create interesting color combinations and patterns.
- Continue laying down tissue pieces, applying decoupage solution, and overlapping edges until the sneakers are covered to your liking. You can get creative with different color arrangements and patterns.
- Once the tissue paper is in place, apply a top coat of outdoor decoupage solution over the entire surface of the sneakers. This will seal the tissue paper and provide protection against moisture and wear.
- Allow the sneakers to dry thoroughly according to the instructions provided with the decoupage solution. Multiple coats may be applied for better protection, but make sure to let each coat dry before applying the next.
- As an optional decorative touch, string beads onto the laces of the sneakers. You can choose beads that match the colors of the tissue paper or opt for contrasting colors for a unique look.
- Once the sneakers are completely dry, they will be ready to wear with their new tissue paper decoupage design. Remember to handle them with care, as excessive rubbing or exposure to water may damage the decoupage finish. Enjoy your personalized and colorful sneakers!


Supplies
Instructions
Contributor
Terri is the creator of makingfriends.com, freekidscrafts.com, scoutswaps.com and badginabag.com. Her work is republished all over the internet and is considered the queen of kids crafts.
0 thoughts on “Decoupage Sneaker Craft”