


DIY Pine Cone Fire Starter
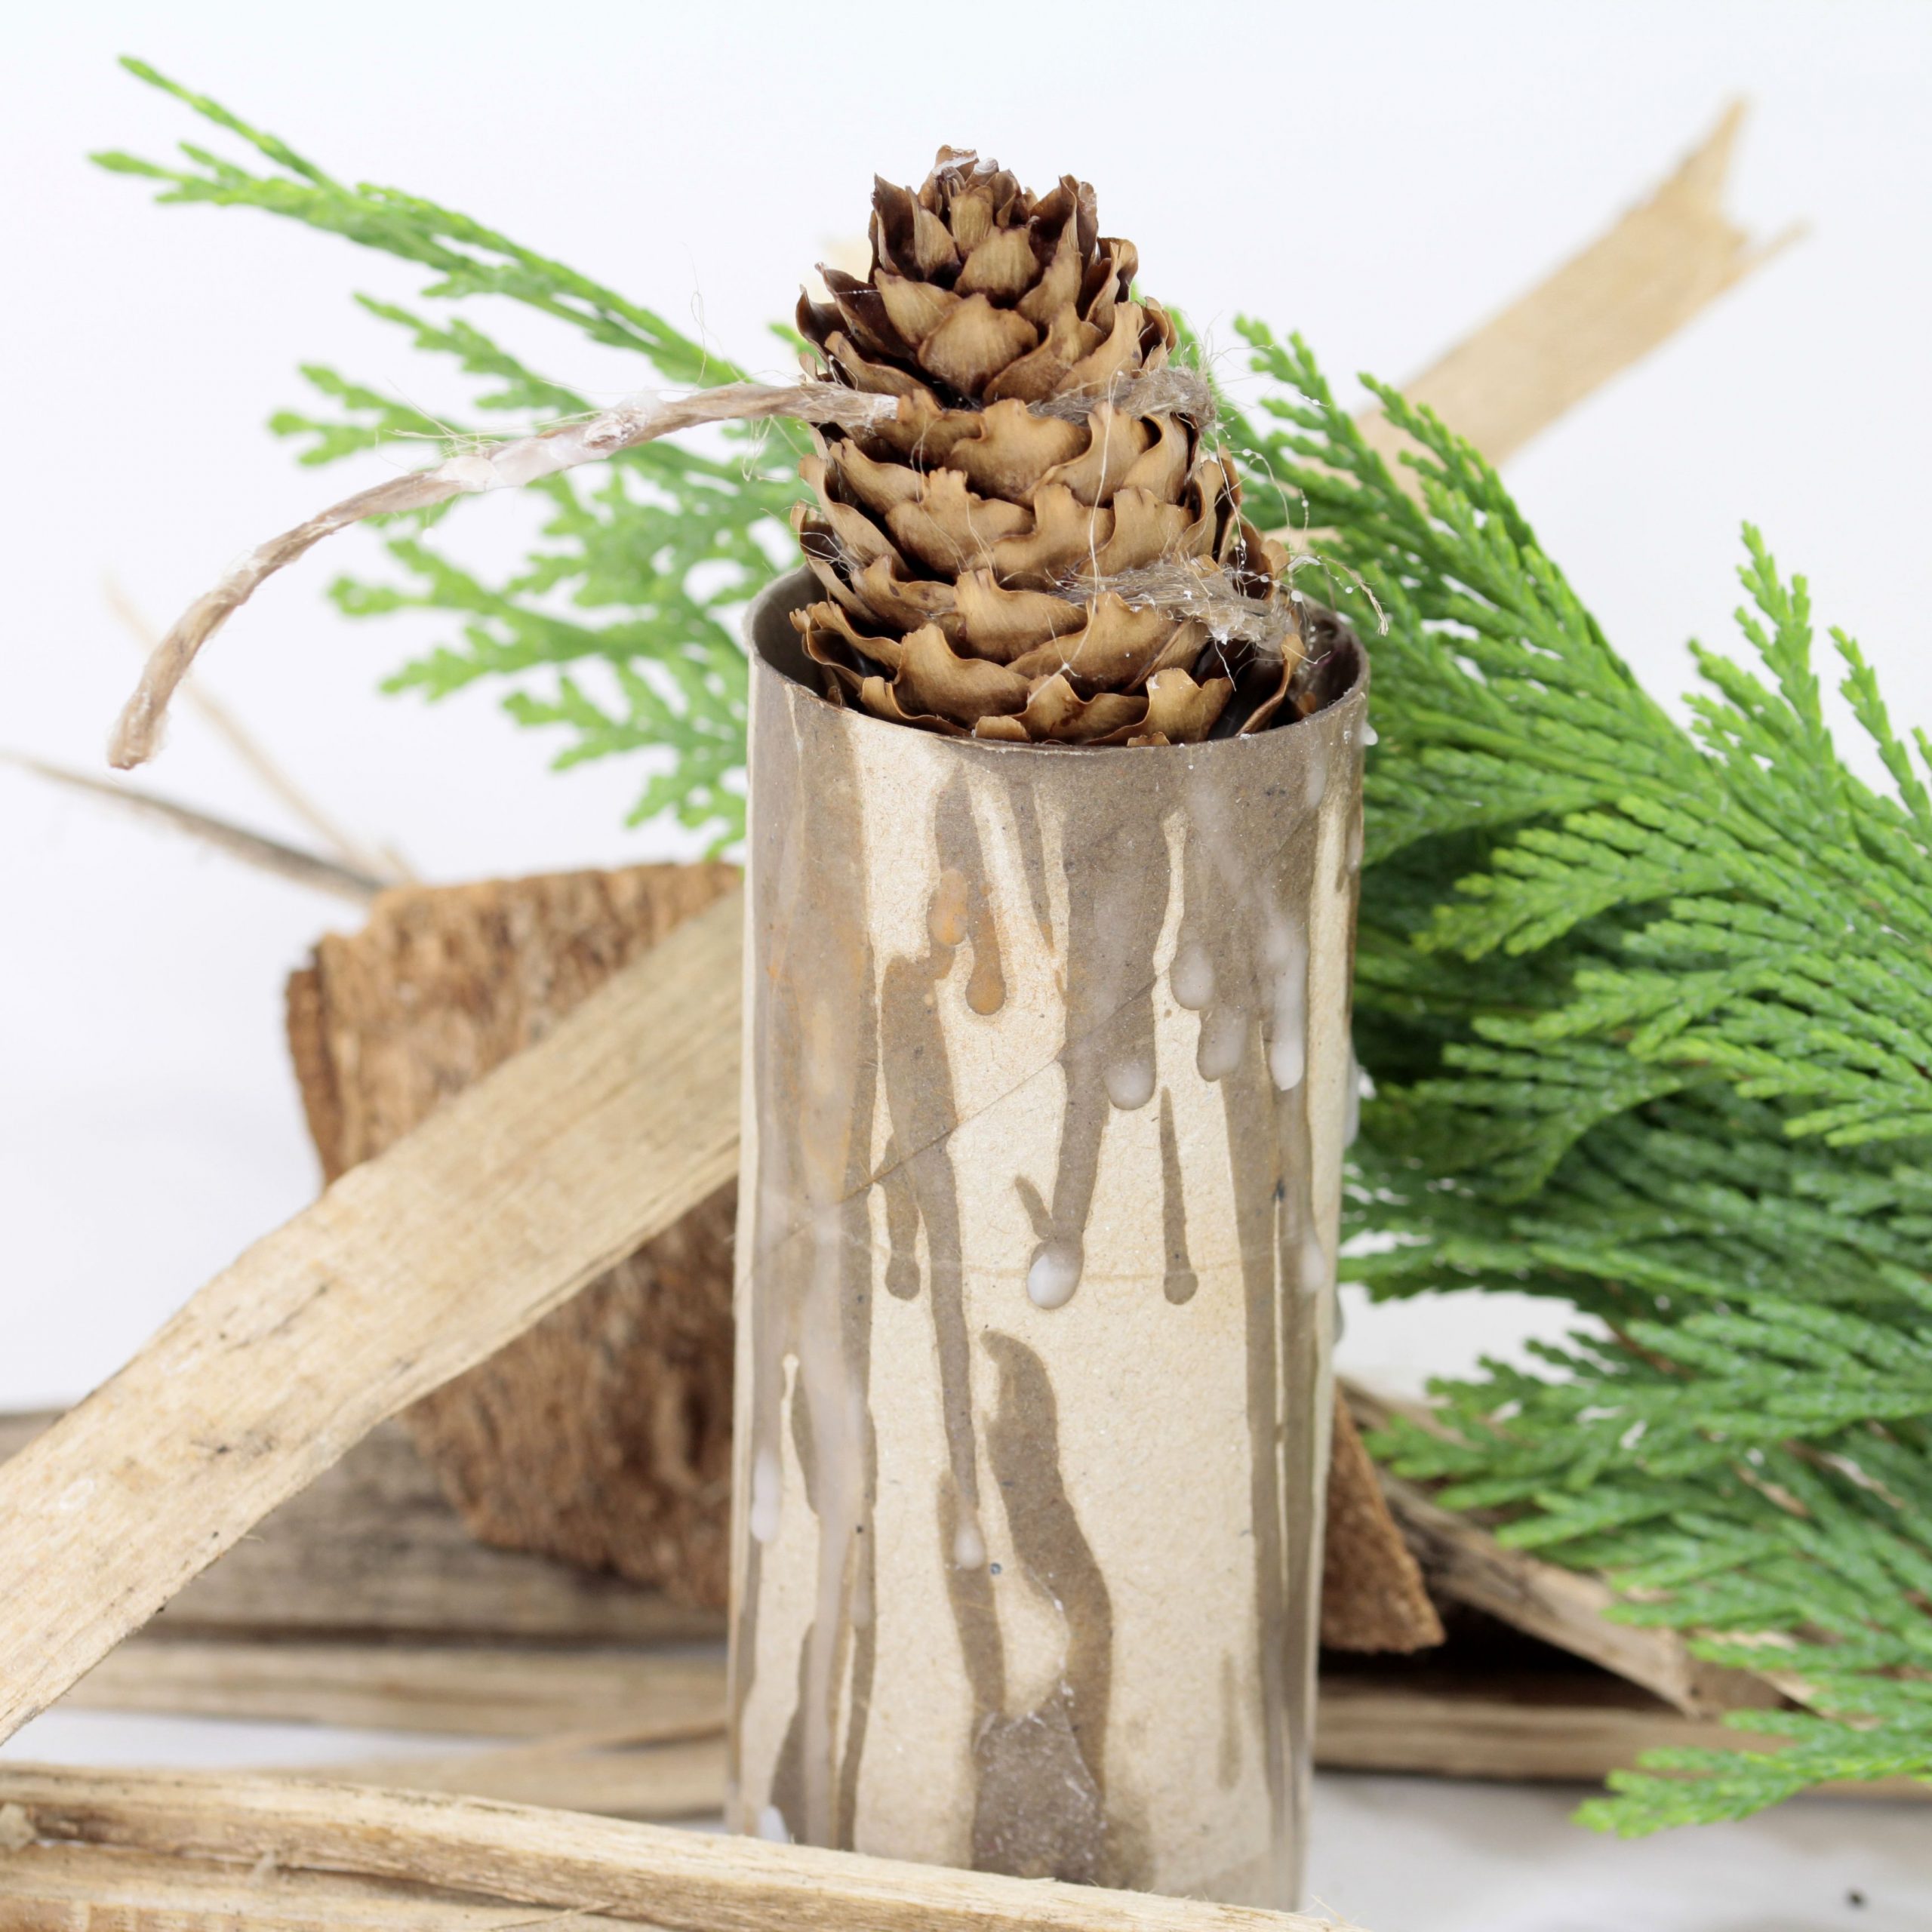
Make your own Pine Cone Fire Starter with some materials from nature. Starting a fire is something that takes more know how than people realize until they try it the first time. This Pine Cone Fire Starter will give you a head start next time you want to build a fire in your fireplace or campsite.
Trivia:
Did you know pine nuts come from pine cones, but only some pine trees produce nuts large enough to harvest. Source: Michigan State University Extension – Fun Facts About Pine Cones
Supplies
- Pine cones, dry
- White beeswax
- Cooking thermometer
- Double boiler
- Wire
- Cardboard tubes
- Salt (any kind even Epsom salts)
- Raffia
- Newspaper
- Logs and sticks
- Optional: Old crayons for more color or essential oils for aroma
Instructions
- Heat wax in a double boiler to between 150 and 175 degrees to melt.
- Insert a length of wire onto top of pine cone making a hook and, holding wire, carefully dip pine cones into hot wax one at a time.
- Put pine cone on top of cardboard tube and let wax cool before dipping pine cone into wax again and coat with salt right away. Each salt will burn a different color (Epsom salts, white flame; table salt, yellow flame; salt substitute, violet flame)
- Tie approximately five pine cones together with raffia.
- build a tepee of sticks or logs and place string of pine cones on top of newspaper in fireplace or campfire bed before lighting . The starters will burn slowly guaranteeing that logs light.
![]()
Award your kids with an inexpensive and colorful Nature Crafts patch from MakingFriends.com. They can wear them, collect them or trade them.


Supplies
Instructions
Contributor
Want to have some creative family time? Print out our SudBudz® Masks and get crafty with the kiddos! More than just a typical Fizzy Bath Ball, SudPrize® is a first ever line of skin-loving and natural bath products that make bath time Fun for Kids and Easy for Moms. A Free companion App, SudBudz® engages your children into an immersive world of special and unique characters called SudBudz®.
Tags Pine Cone Crafts
0 thoughts on “DIY Pine Cone Fire Starter”