


Fall Tissue Paper Tree Craft
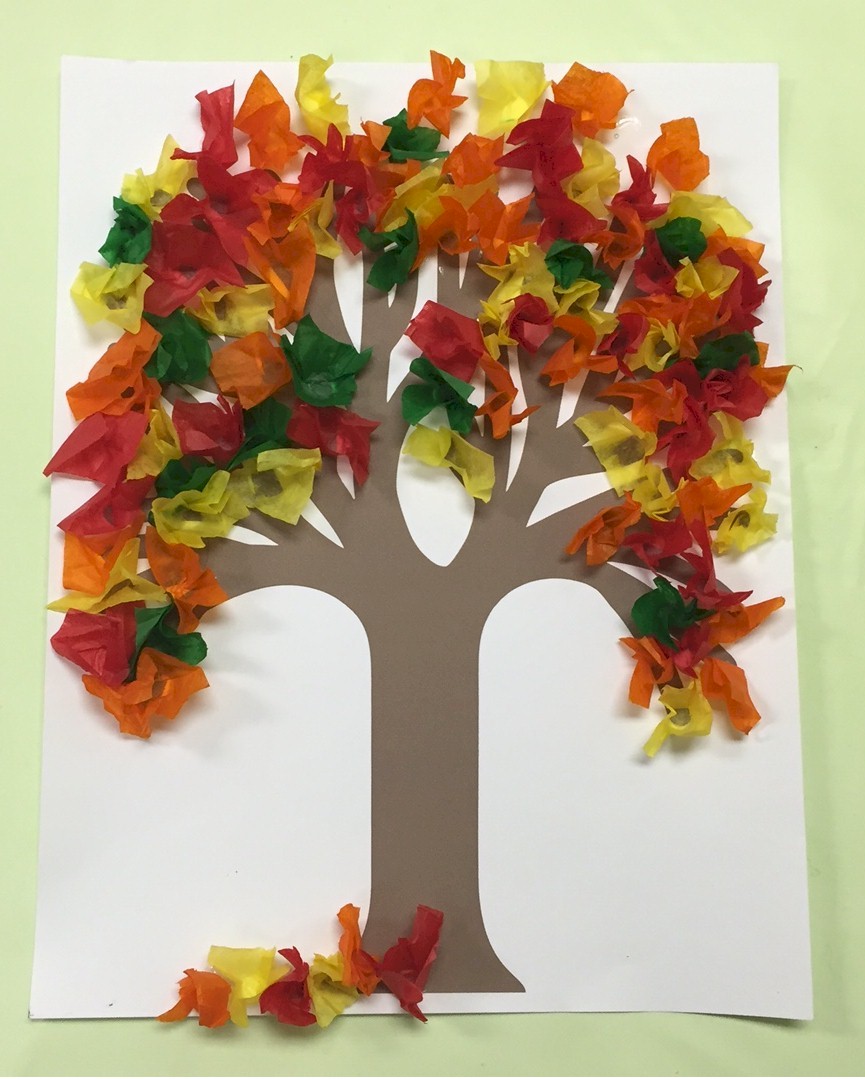
Use your pencil to make the leaves for this Fall Tissue Paper Tree. It gives the tissue paper depth and is less messy and quicker than rolling in a ball and dipping in glue. This technique is especially effective for flowers and leaves and fuzzy animals.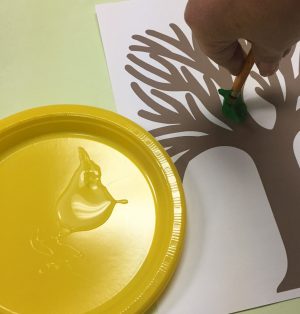
Trivia:
As we know, Chlorophyll gives leaves their green colour and is so dominant it hides the other colours in the leaves. But in the fall, chlorophyll in the leaves breaks down allowing the other colours to finally shine through and show their beautiful reds, yellows, and oranges. Source: How Wee Learn – Science Experiment: Why Do Leaves Change Colour?
Supplies
- Tissue Paper in Fall Colors
- White Card Stock
- Glue
- Pencil
- Paper Plate
Instructions
- Print out tree template on white card stock
- Cut squares of tissue paper (approximately one inch in size).
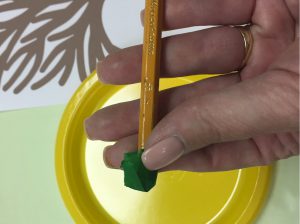
- Wrap one square of tissue paper around the eraser end of the pencil and dip in glue.
- Press onto the tree template one at a time allowing the ends to remain upright.
In a very short time you will have a colorful fall tree for the fridge or bulletin board.
Patterns
Click on a pattern to open it in a new window to print in the correct size

![]()


Supplies
F
Instructions
Contributor
Want to have some creative family time? Print out our SudBudz® Masks and get crafty with the kiddos! More than just a typical Fizzy Bath Ball, SudPrize® is a first ever line of skin-loving and natural bath products that make bath time Fun for Kids and Easy for Moms. A Free companion App, SudBudz® engages your children into an immersive world of special and unique characters called SudBudz®.
Tags tissue paper crafts
0 thoughts on “Fall Tissue Paper Tree Craft”