


DIY Tissue Paper Christmas Wreath
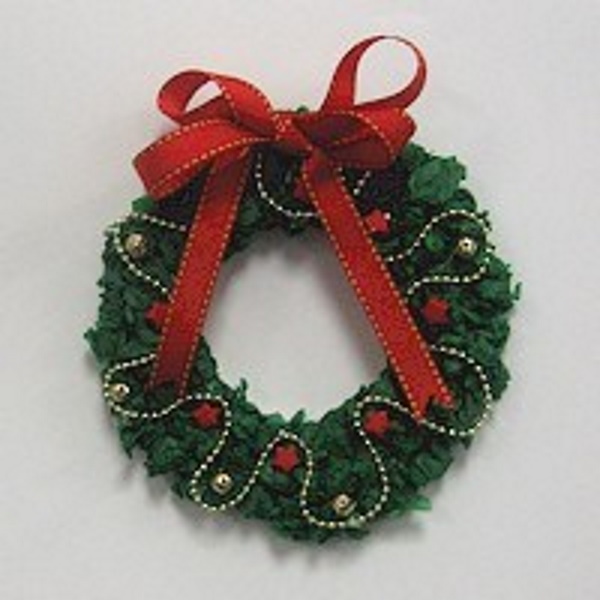
Let the kids grab your leftover beads and trim and deck the halls with this easy Tissue Paper Christmas Wreath created by the FreeKidsCrafts team. Each wreath can be an original depending on the decorations you apply. This craft is small and will make a pretty package decoration or ornament for the tree.
Trivia:
During the 16th century in Germany, pruning the tree was a part of the preparation process. “Limbs were often cut off in an attempt to make the tree more uniform in shape or to fit into a room,”. Instead of throwing the pieces of greenery away, the Europeans wove the excess into wreaths. Source: History – Christmas Wreaths Are a Classic Holiday Decoration With a Surprisingly Deep History
Supplies
- Heavy weight paper or card stock
- Wreath Pattern below
- Tacky glue
- Green tissue Paper
- Miscellaneous beads and trim
- Ribbon
- Hot Glue Gun (optional)
- Scissors
Instructions
- Print out Wreath pattern. Cut out the outline before you glue the tissue paper.
- Cut tissue paper into 2″ squares. Crumple each piece into a tight ball. Dip into white glue and place onto pattern. Continue crumpling and gluing down pieces until the entire pattern is filled.
- Clean out your odds and ends of beads and trim and decorate as you like. Make a bow and glue to the top of the wreath.
- Note: Some heavier trims may adhere better by using a hot glue gun, which should only be handled by a responsible adult.
Patterns, Templates and Printables
Click on a pattern to open it in a new window to print

![]()


Supplies
Instructions
Patterns, Templates and Printables
Click on a pattern to open it in a new window

Contributor
Want to have some creative family time? Print out our SudBudz® Masks and get crafty with the kiddos! More than just a typical Fizzy Bath Ball, SudPrize® is a first ever line of skin-loving and natural bath products that make bath time Fun for Kids and Easy for Moms. A Free companion App, SudBudz® engages your children into an immersive world of special and unique characters called SudBudz®.
Tags Christmas crafts for kidskids craftstissue paper crafts for kids
0 thoughts on “DIY Tissue Paper Christmas Wreath”