


Fall Napkin Rings
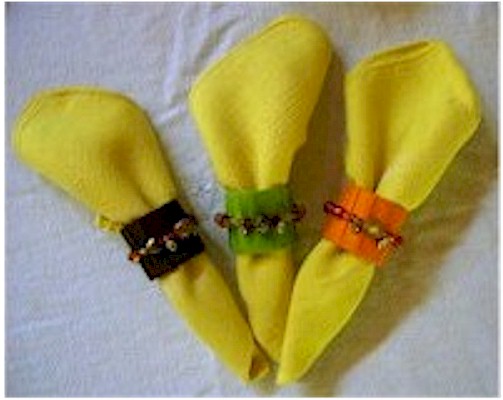
Set your party table with these beautiful beaded Fall Napkin Rings. Great for Thanksgiving, birthdays, Halloween and any fall occasion. Teens, think about making these for someone special like mon, grandma or a favorite aunt.
Supplies
1 ¾-inch diameter 1 ½-inch tall PVC coupling (from the plumbing supply section of your hardware store)
43 inches bias tape (I buy it in rolls to save money.)
9 inches .5mm-thick Stretch Magic beading elastic
Autumn colored beads
2 pewter leaf charms (optional)
Scissors
Thick PVA glue like Delta Sobo Premium Craft & Fabric Glue A small binder clip (the black kind with collapsible “handles” used to clip papers together)
Regular paper clips
Instructions
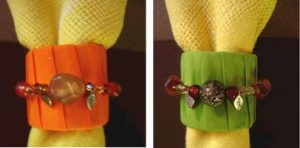
Lay out a 6-inch length of beads. I used mostly plastic beads that came in the coordinated pack. This makes the napkin rings lightweight and also keeps the cost down. I interspersed a few wood beads and a few glass for variety. The pewter leaf charms are placed on either side of the focal bead.
Refer to the photos below for design ideas.
When you’re happy with your design, pinch the clip onto one end of the stretchy cord and string the beads onto the free end. No beading needle necessary; the stretchy cord has enough body on its own.
Remove the pinch clip and bring the two cord ends together. Stretch them tight and tie a double knot. Cut off the cord ends leaving a half-inch tail.
Gently tug the cord to pull the knot back through a couple beads and hide part of the tail. Cut off any excess.
Making the Napkin Ring
Smear a layer of glue all around the PVC ring. Put a dab of glue on the end of a length of bias tape.
Place the glued end inside the ring at an angle and secure it with a regular paper clip. Thread the bias tape around the coupling overlapping very slightly as shown in the photos.
Trim the end so that it will end (and be hidden) inside the ring. Put glue on the end of the tape and reposition the paper clip to secure it in place.
With your fingertips, moisten the outside of the bias tape. This serves to distribute the glue evenly underneath and tightens the wrap since the bias tape shrinks a little as it dries.
Stretch the bead ring around the napkin ring and position it. Put dabs of glue under several beads where they contact the ring. Set aside to dry.
Images
Contributor
![]()
The Artful Crafter
After spending years as first a teacher and then as a VP of Finance for a major corporation, I took early retirement to devote time to my true passion, crafting. I own a small craft store, do custom orders and run The Artful Crafter website.
Supplies
Instructions
Contributor
Want to have some creative family time? Print out our SudBudz® Masks and get crafty with the kiddos! More than just a typical Fizzy Bath Ball, SudPrize® is a first ever line of skin-loving and natural bath products that make bath time Fun for Kids and Easy for Moms. A Free companion App, SudBudz® engages your children into an immersive world of special and unique characters called SudBudz®.
0 thoughts on “Fall Napkin Rings”